Historically, fermentation was a way for ancient civilizations to preserve foods, but more recently, this food preparation process has taken centre stage for its proposed health benefits, most notably gastro-intestinal health from all those tasty probiotics.
The process of fermentation requires careful attention and a close relationship with food — adding depth to the process of preparation. Whether it’s knowing what smells to look out for, what ingredients to use, or the temperament of yeast, it is a truly fascinating method of food preparation.
The Cascade spoke to a few local makers to get their take on why fermented foods are so unique and what they love about them, and even shared a few recipes so you can start fermenting foods yourself at home.
 Sourdough
By Andrea Sadowski
April Nickel, a UFV Computer Information Systems alumna, made her first loaf of sourdough back in March of 2019. It all started when a visitor from Manitoba came to stay with her family for some time and he brought his sourdough starter with him. Nickel was appalled at this man’s outrageous schedule revolving around his precious sourdough that saw him waking up at 4 a.m. to bake the perfect loaf. Yet, when she tried it, she was hooked. It was the best bread she had ever tasted. Not wanting to wake up at 4 a.m, Nickel and her sister-in-law did some research and found the perfect sourdough “method” that works for them. Nickel was kind enough to show The Cascade her whole process.
While a starter is best gifted to connect you with others in the sourdough community, it is incredibly simple to make your own. Sourdough starter is made up of just flour and water, colonizing the wild yeast and lactic acid bacteria naturally through daily “feedings.”
Start by adding equal parts flour and water to a jar; a good amount would be 50 grams of each. An important aspect of making a starter (and baking in general) is to always measure your ingredients by weight, not by volume.
Sourdough starter is alive and active; the natural yeast and bacteria need to be constantly fed new carbohydrates to stay alive. Feeding your starter simply means adding more flour and water to the jar. Be sure to discard a little every time you feed it so that you don’t end up with a giant mass of starter. Feed it one or two times a day when you are first giving it life, and keep it at room temperature, but a little on the warmer side.
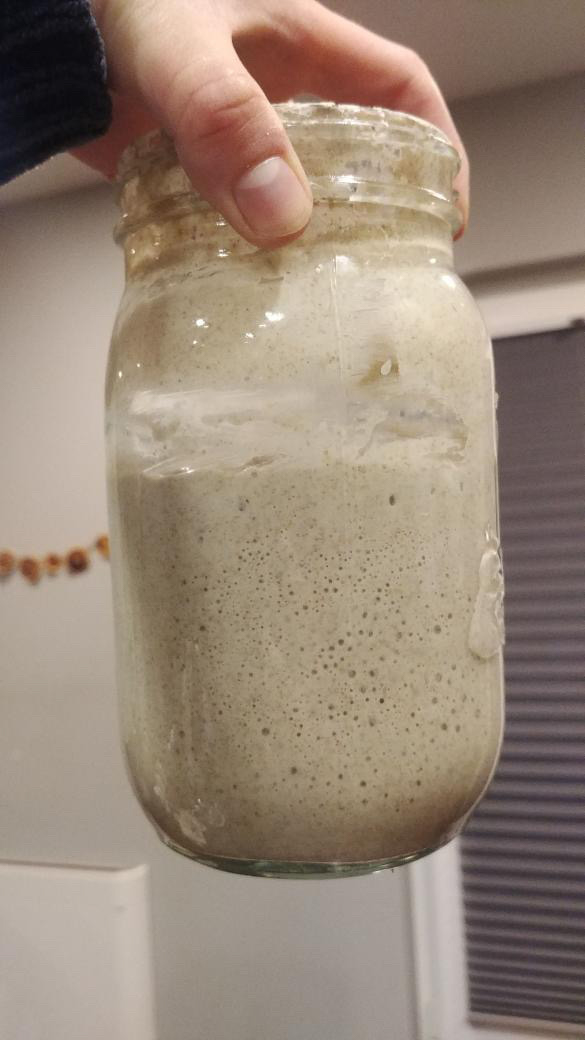 You will know it’s alive because of the bubbles, smell, and texture. It helps to make a starter in a glass jar or container so that you can see bubbles forming at the top, bottom, and throughout the jar. The yeasty, tangy smell also indicates a “ripe” starter. Its texture will become incredibly soft and moist, with the bubbles reminiscent of an almost honeycomb-like texture.
After a few weeks of daily feedings, you can store your starter in the fridge. Nickel keeps her mason jar of starter in the fridge and now only feeds her starter before she is going to use it. She likes to feed her starter twice before baking because she doesn’t like really sour sourdough. The less you feed it, the more sour it will become.
“People will often follow very strict rules,” said Nickel, “often because they were taught those rules by someone else and think ‘this is the only way to do sourdough,’ and that’s silly. Some people bring in ratios and percentages when it comes to feeding and discarding starter, but that doesn’t really matter. It’s so simple to keep.”
Nickel does advise, however, that you flush your discarded starter down the toilet, as it will go rancid quickly in the compost or garbage and will harden and clog up your sink if you try to wash it down the drain. Better yet, gift the discard to someone else, being sure to feed the new starter before giving it away so it remains active.
“It’s not incredibly difficult,” said Nickel. “It’s just time, flour, and water. Time is the biggest thing. I think with society in general, we’re a very instant gratification type of people.”
Nickel found the easiest method to follow was from UK food blogger Elaine Boddy, who prides herself in keeping sourdough simple and accessible.
April Nickel’s sourdough method
Step one: Add your ingredients to a bowl.
Start by taking some of your starter from the jar, feeding it, and leaving it to sit on the counter overnight. When you’re ready to start making your dough, measure 50 grams of starter into a bowl.
Add 350 grams of water to the starter, a 70 per cent hydration ratio to flour.
Add 500 grams of flour to the bowl. Nickel likes to make 10 per cent of her flour whole wheat. She uses 450 grams of all purpose flour and 50 grams of whole wheat flour.
Finally, add 10 grams of salt, a crucial ingredient that plays a very important role in baking bread.
Step two: Mix your ingredients.
The initial mixture will be shaggy, meaning the ingredients will be just combined but not a perfect ball of dough. Nickel uses a tool called a Danish dough whisk to mix the four ingredients together, but there is no need to go buy fancy tools. Just use a regular wooden spoon.
Step three: Stretch and fold your dough.
Nickel follows a no-knead process called “stretch and folds.” This action is undertaken exactly as it sounds — by simply stretching out the dough, folding it over a couple of times, and then letting the dough rest. Aim to stretch and fold once every half hour for two hours. This method builds strength and tension in the dough without having the hassle of kneading it. The ball of dough will become shinier, smoother, and more ball-like each time you stretch and fold it. Leave your stretched and folded dough in the bowl overnight, covered with a damp tea towel. Leave it on the kitchen counter in the winter and in the fridge during the hot summer months.
Step four: Shape your dough.
In the morning, you will shape your dough. Nickel shapes her dough in a banneton bread basket, but don’t fret if you don’t have a special bread basket. Simply put a clean, dry tea towel in another bowl and sprinkle a bunch of flour on the towel so that the dough doesn’t stick. Do another gentle round of stretch and folds to bring your dough baby into a ball, flip it gently over into one hand, and plop it back down (gently) into the second bowl, same side down as it was in the first bowl. Cover the bowl with the damp tea towel and leave it out to proof (let it rise a final time) for another few hours, until you are ready to bake it.
Nickel likes to shape her dough in the morning, after it has been proofing all night, and then bakes it in the evening when she comes home from work. Keep in mind, the longer you leave the dough sitting, the more sour it’s going to be.
Step five: Score and bake your dough.
When you’re ready to bake, you can choose to preheat your oven or not. Nickel follows Boddy’s method in that she puts her bread in a cold oven, which saves heating energy and is very convenient, as pre-heating is an all-too-often forgotten first step in recipes. Set your oven to 450°F.
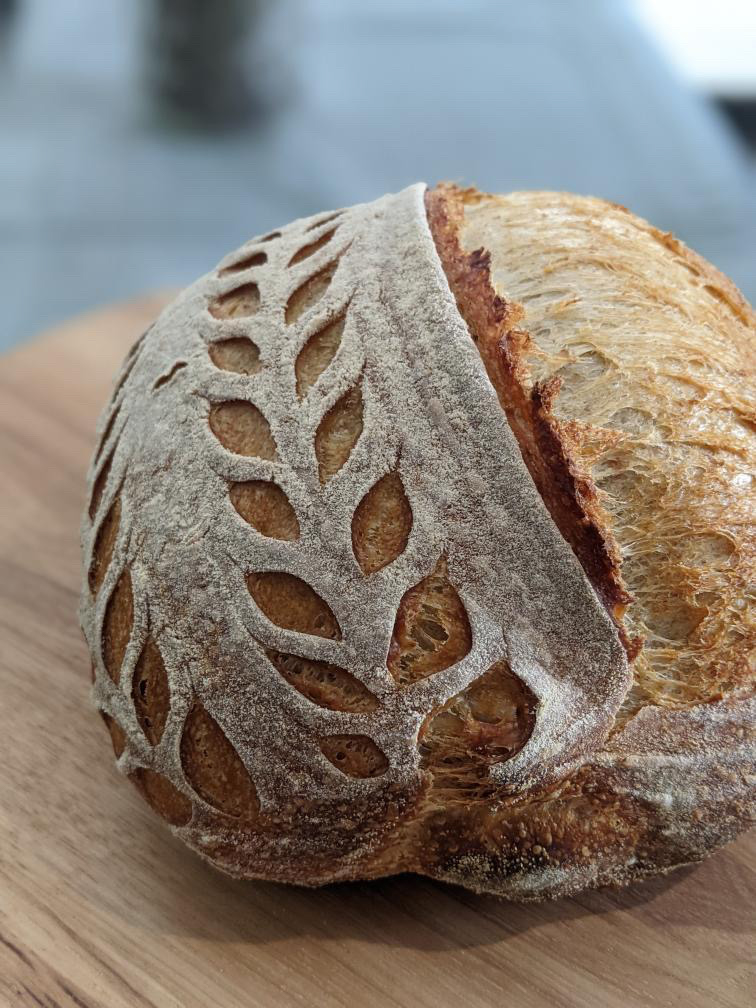
Line a dutch oven, roasting pan, or any other big-enough vessel that has a lid, with parchment paper. Sprinkle more flour overtop of your shaped dough and flip the ball out onto the parchment paper, floured side down. Now, it’s time for scoring. Use a razor blade or a very sharp knife to cut scores into the dough. This is just a way of conducting the tears that the bread is going to make anyway as the steam escapes it during baking. Nickel has a lot of fun scoring pretty designs into the tops of her bread, but you can keep it simple with just a straight line. You can also choose not to score it for a more rustic look.
Bake in your covered vessel for 50 minutes, until the top looks crispy and golden. Be sure to keep the lid on the whole time to keep the steam in which lets it rise better. Once it’s done baking, take the bread out of the pan by lifting the loaf up with the parchment paper and placing it on a cooling rack. While it may be tempting to cut into the freshly baked, steaming bread right away, Nickel advises to wait until it is fully cooled to cut into it, as it is still technically cooking as it cools. If you dig in right away, it affects the texture, making it slightly gummy.
Making sourdough from scratch requires time, patience, and planning. It has a very scientific, yet flexible process. Bread making can be used as a mindfulness practise, as it requires clear, methodological thought as well as creative flexibility. You can make sourdough at home yourself with just flour, water, and salt.
Koji fermentation
By Sydney Marchand
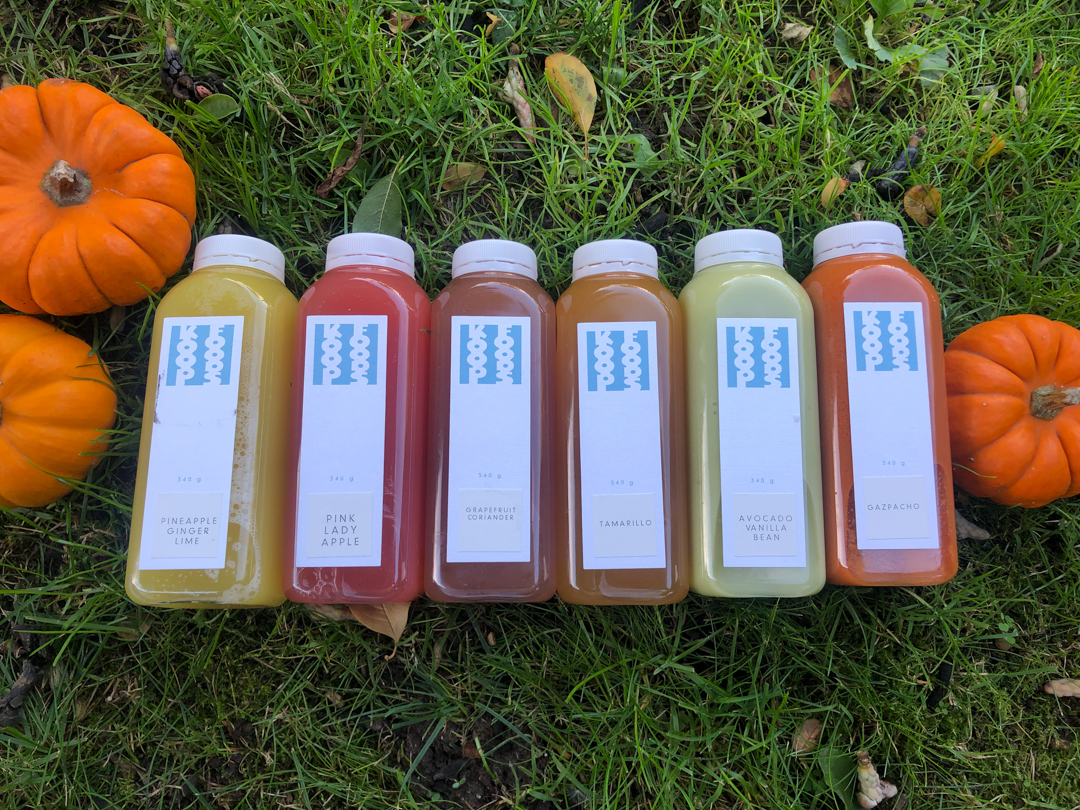
While many businesses struggled and shut down throughout the COVID-19 pandemic, Jeff Koop took an unexpected employment shift to refocus his goals and start a company that focuses on sourcing from local farmers while incorporating unique culinary techniques. Koop decided to take the plunge and create Koop Foods, offering a variety of plant-based dressings, sauces, dips, and juices throughout the Lower Mainland and Greater Vancouver Area.
After working in the food industry for many years, food intolerances and allergies were not uncommon requests on Koop’s radar. Gluten-free, dairy-free, soy-free, vegan, canola oil-free, nut-free, corn-free, and keto, just to name a few, continue to rapidly increase diet restrictions in our world today.
“I wanted my products to be enjoyed by as many people as possible that can cover all the most common dietary restrictions we see today in 2021,” Koop said.
According to Koop, the key to success with many plant-based products is to create a strong umami flavour. This is typically described as the pleasant, savoury component of amino acids that our taste buds crave, but it can be a challenge to accomplish without the use of animal, gluten, or soy products.
“I had to find a creative, cost-effective strategy to add a boost of umami to foods without corn, soy, and wheat,” Koop said; this is when he revisited his culinary teachings and turned to fermentation.
A staple fermented product Koop makes is shio koji — a traditional Japanese fermented rice seasoning similar to miso. Essentially, it starts with a mold fermentation process that creates koji cultures. It’s not a lactic acid (like kimchi) or yeast (like alcohol) fermentation that we typically see; it’s very unique and can take as little as one or two weeks to ferment.The koji cultures are created when grains are inoculated with mold spores and then added with water and salt for a second fermentation. Depending on how long it is fermented, it can take on different textures and can be an incredibly useful ingredient to add a strong umami flavour to products. This is added to many of Koop Foods’ salad dressings and sauces for an extra delish kick.
With koji rice especially, it is important to look out for obvious signs of contamination or spoilage. Black mold is obviously bad news, but there are other types of white molds that can also indicate the product has gone bad. Therefore, learning from someone with experience in this type of fermentation is always ideal, as they can teach you these “red flags” first hand and provide you with insight into the process.
“You use all your senses,” Koop explained; “Of course, if something smells bad, you don’t use it. You learn over time.”
“As a chef, the closer you get to the growing process, the better the food tastes, and the closer you get to the farmer and producers, the more it shows up on the plate. Learning about ingredients as living things is incredibly complicated, and if you’re open-minded and curious then you’ll quickly realize that there is nothing better than being immersed in the process.”
Be sure to follow Koop Foods (@koop.foods) on Instagram and check out their website to keep up to date with vendor locations and new creations. For those of us who are just starting our fermentation journey, Koop has provided The Cascade with a basic lactic acid pickle recipe. Enjoy!
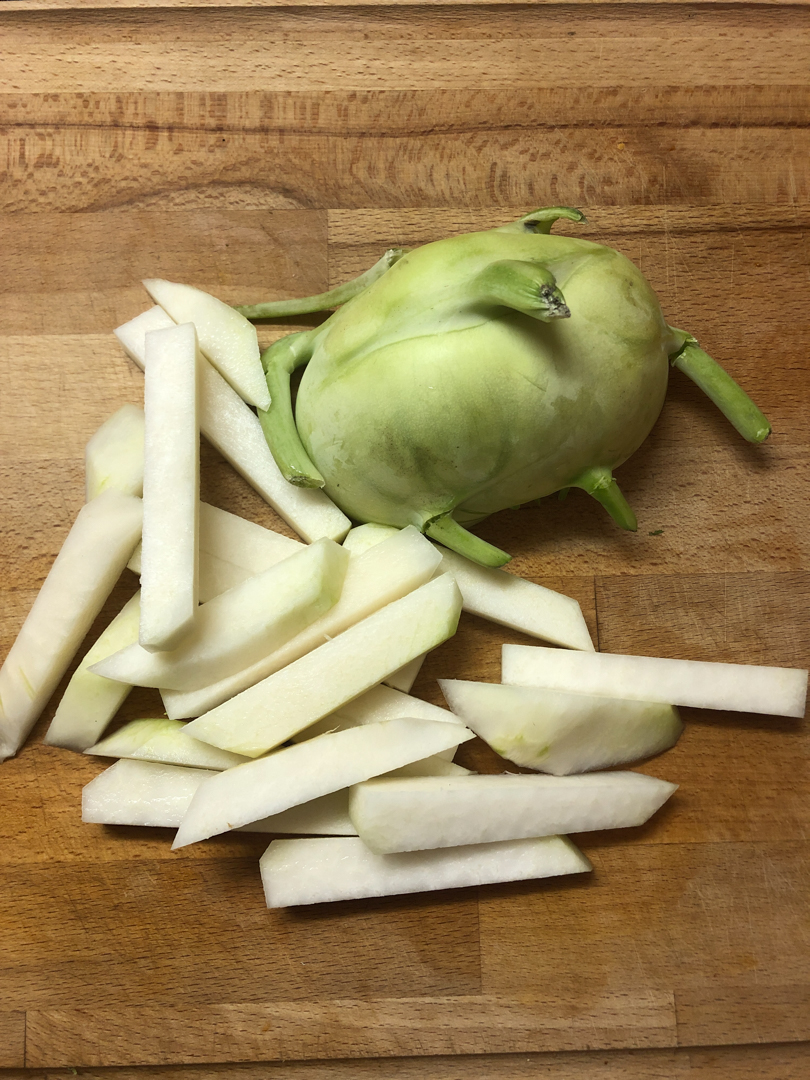 Jeff Koop’s spicy kohlrabi pickle
Ingredients
1 large kohlrabi, peeled
1 Thai chili, stemmed and minced
1 litre water
3 tbsp + 1 tsp salt
Method
Step 1: Prepare brine by whisking together salt, water, and Thai chili.
Step 2: Cut kohlrabi in half and then slice into 1 cm thick pieces.
Step 3: Add kohlrabi to brine in a container big enough to hold everything plus a little extra room.
Step 4: Put a small plate or lid directly on the surface of the pickles and then place a weight on top of that to keep the kohlrabi submerged in the brine.
Step 5: Seal the container and ferment at room temperature for 5 – 7 days.
Step 6: Remove the plate and weight, then keep the pickled vegetables refrigerated and use as needed.
Images: April Nickel & Sydney Marchand/The Cascade

